ReaCoMa
The ReaCoMa source code can be found here: /Software/ReaCoMa.
ReaCoMa is a collection of Lua scripts that facilitate using the Fluid Decomposition Toolbox algorithms within the REAPER digital audio workstation. This toolbox is designed to facilitate signal decomposition, audio descriptor analysis and automatic segmentation.
My main motivation for creating ReaCoMa was to consolidate my compositional workflow, which prior to its creation involved alternating between REAPER, the command line and Max. Having to alternate between two or more distinct pieces of software, with vastly different interfaces and setups is a suboptimal compositional workflow, especially for tasks which benefit from a tight feedback loop between processing and listening. For example, processing audio files in Max and accessing the results within REAPER requires outputting those results to disk and making them a part of the REAPER session. This can be time consuming if there are lots of audio files. ReaCoMa solves this problem by allowing me to execute those algorithms directly in REAPER, making them feel like a native extension to that environment.
ReaCoMa has matured over a number of iterations as I incorporated it into my compositional practice. Nonetheless, even in its earliest versions it facilitated computer-led decomposition of sounds which had a large impact on how I composed the works and structured my engagement with audio-based corpora.
Implementation
ReaCoMa functions as a scripting bridge between the FluCoMa command line executables and the REAPER session where media items are positioned, selected and manipulated on a timeline. Thus, ReaCoMa offers a suite of scripts, where each script is responsible for implementing a single algorithm from the Fluid Decomposition Toolbox and orchestrating the necessary processing and changes to the session. For example, fluid-hpss.lua is used to execute the fluid.hpss algorithm, the same as what is found in Max as the object fluid.hpss~.
To start, the user runs one of the Lua scripts while a media item or group of items are selected. This provides an interface for configuring parameters. This is shown in IMAGE 5.3.1.

IMAGE 5.3.1: User interface for parameter selection is shown after selecting and running one of the Lua scripts.
Once the user has configured the parameters they can execute the algorithm by clicking the “OK” button. In response to this the REAPER session will be updated. The nature of the update depends on the type of algorithm. In this case, fluid-hpss.lua returns two new takes and appends them to the source media item. This is depicted in IMAGE 5.3.2. One take will contain the harmonic component while the other take will contain the percussive component. This facilitates rapid auditioning of the decomposition results by toggling which take is active. I have found this interface particularly potent in my compositional process as the source material is always stored and attached to the decomposition results, allowing me to follow the development of sonic materials directly in the REAPER session.
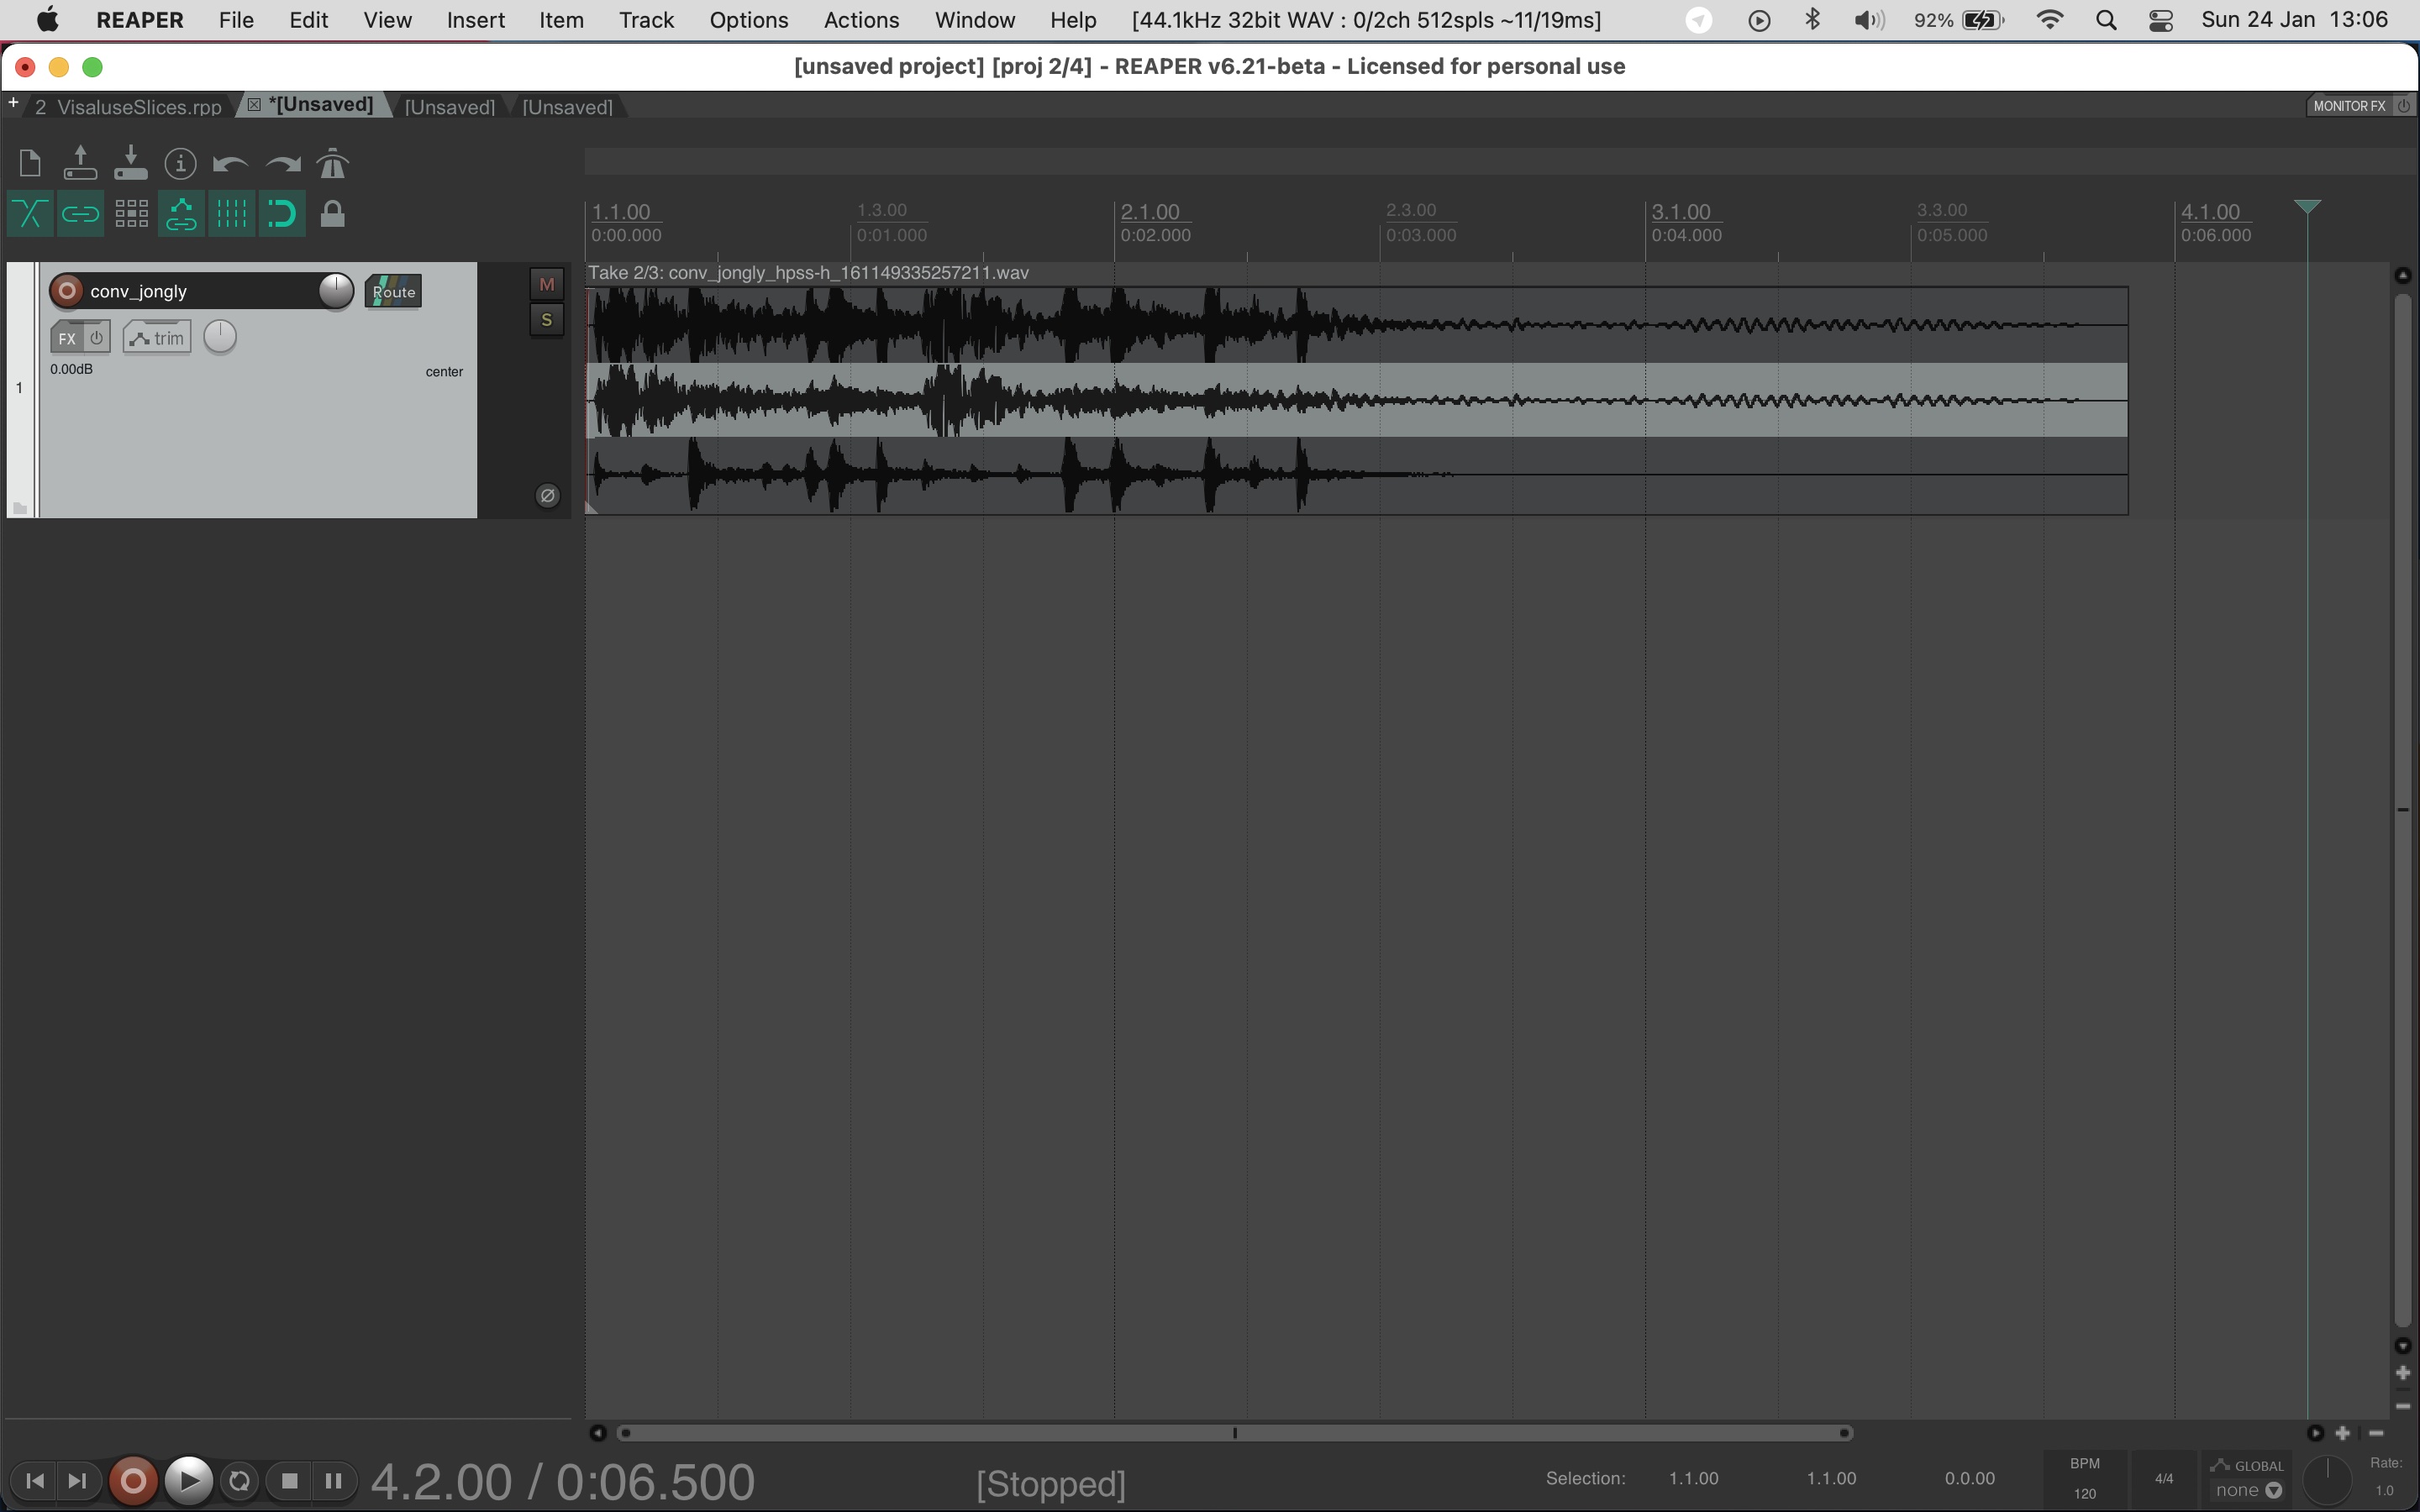
IMAGE 5.3.2: New takes containing the harmonic and percussive components are appended to the source media item.
For the segmentation algorithms (fluid-onsetslice.lua, fluid-noveltyslice.lua, fluid-ampslice.lua, fluid-ampgate.lua, fluid-transientslice.lua) the original source media item is divided at the slice time points returned by the algorithm. This does not create new audio files on disk, rather, it creates new takes with the original source audio file and adjusts the start and length of those takes. IMAGE 5.3.3 shows a file segmented with fluid-noveltyslice.lua.
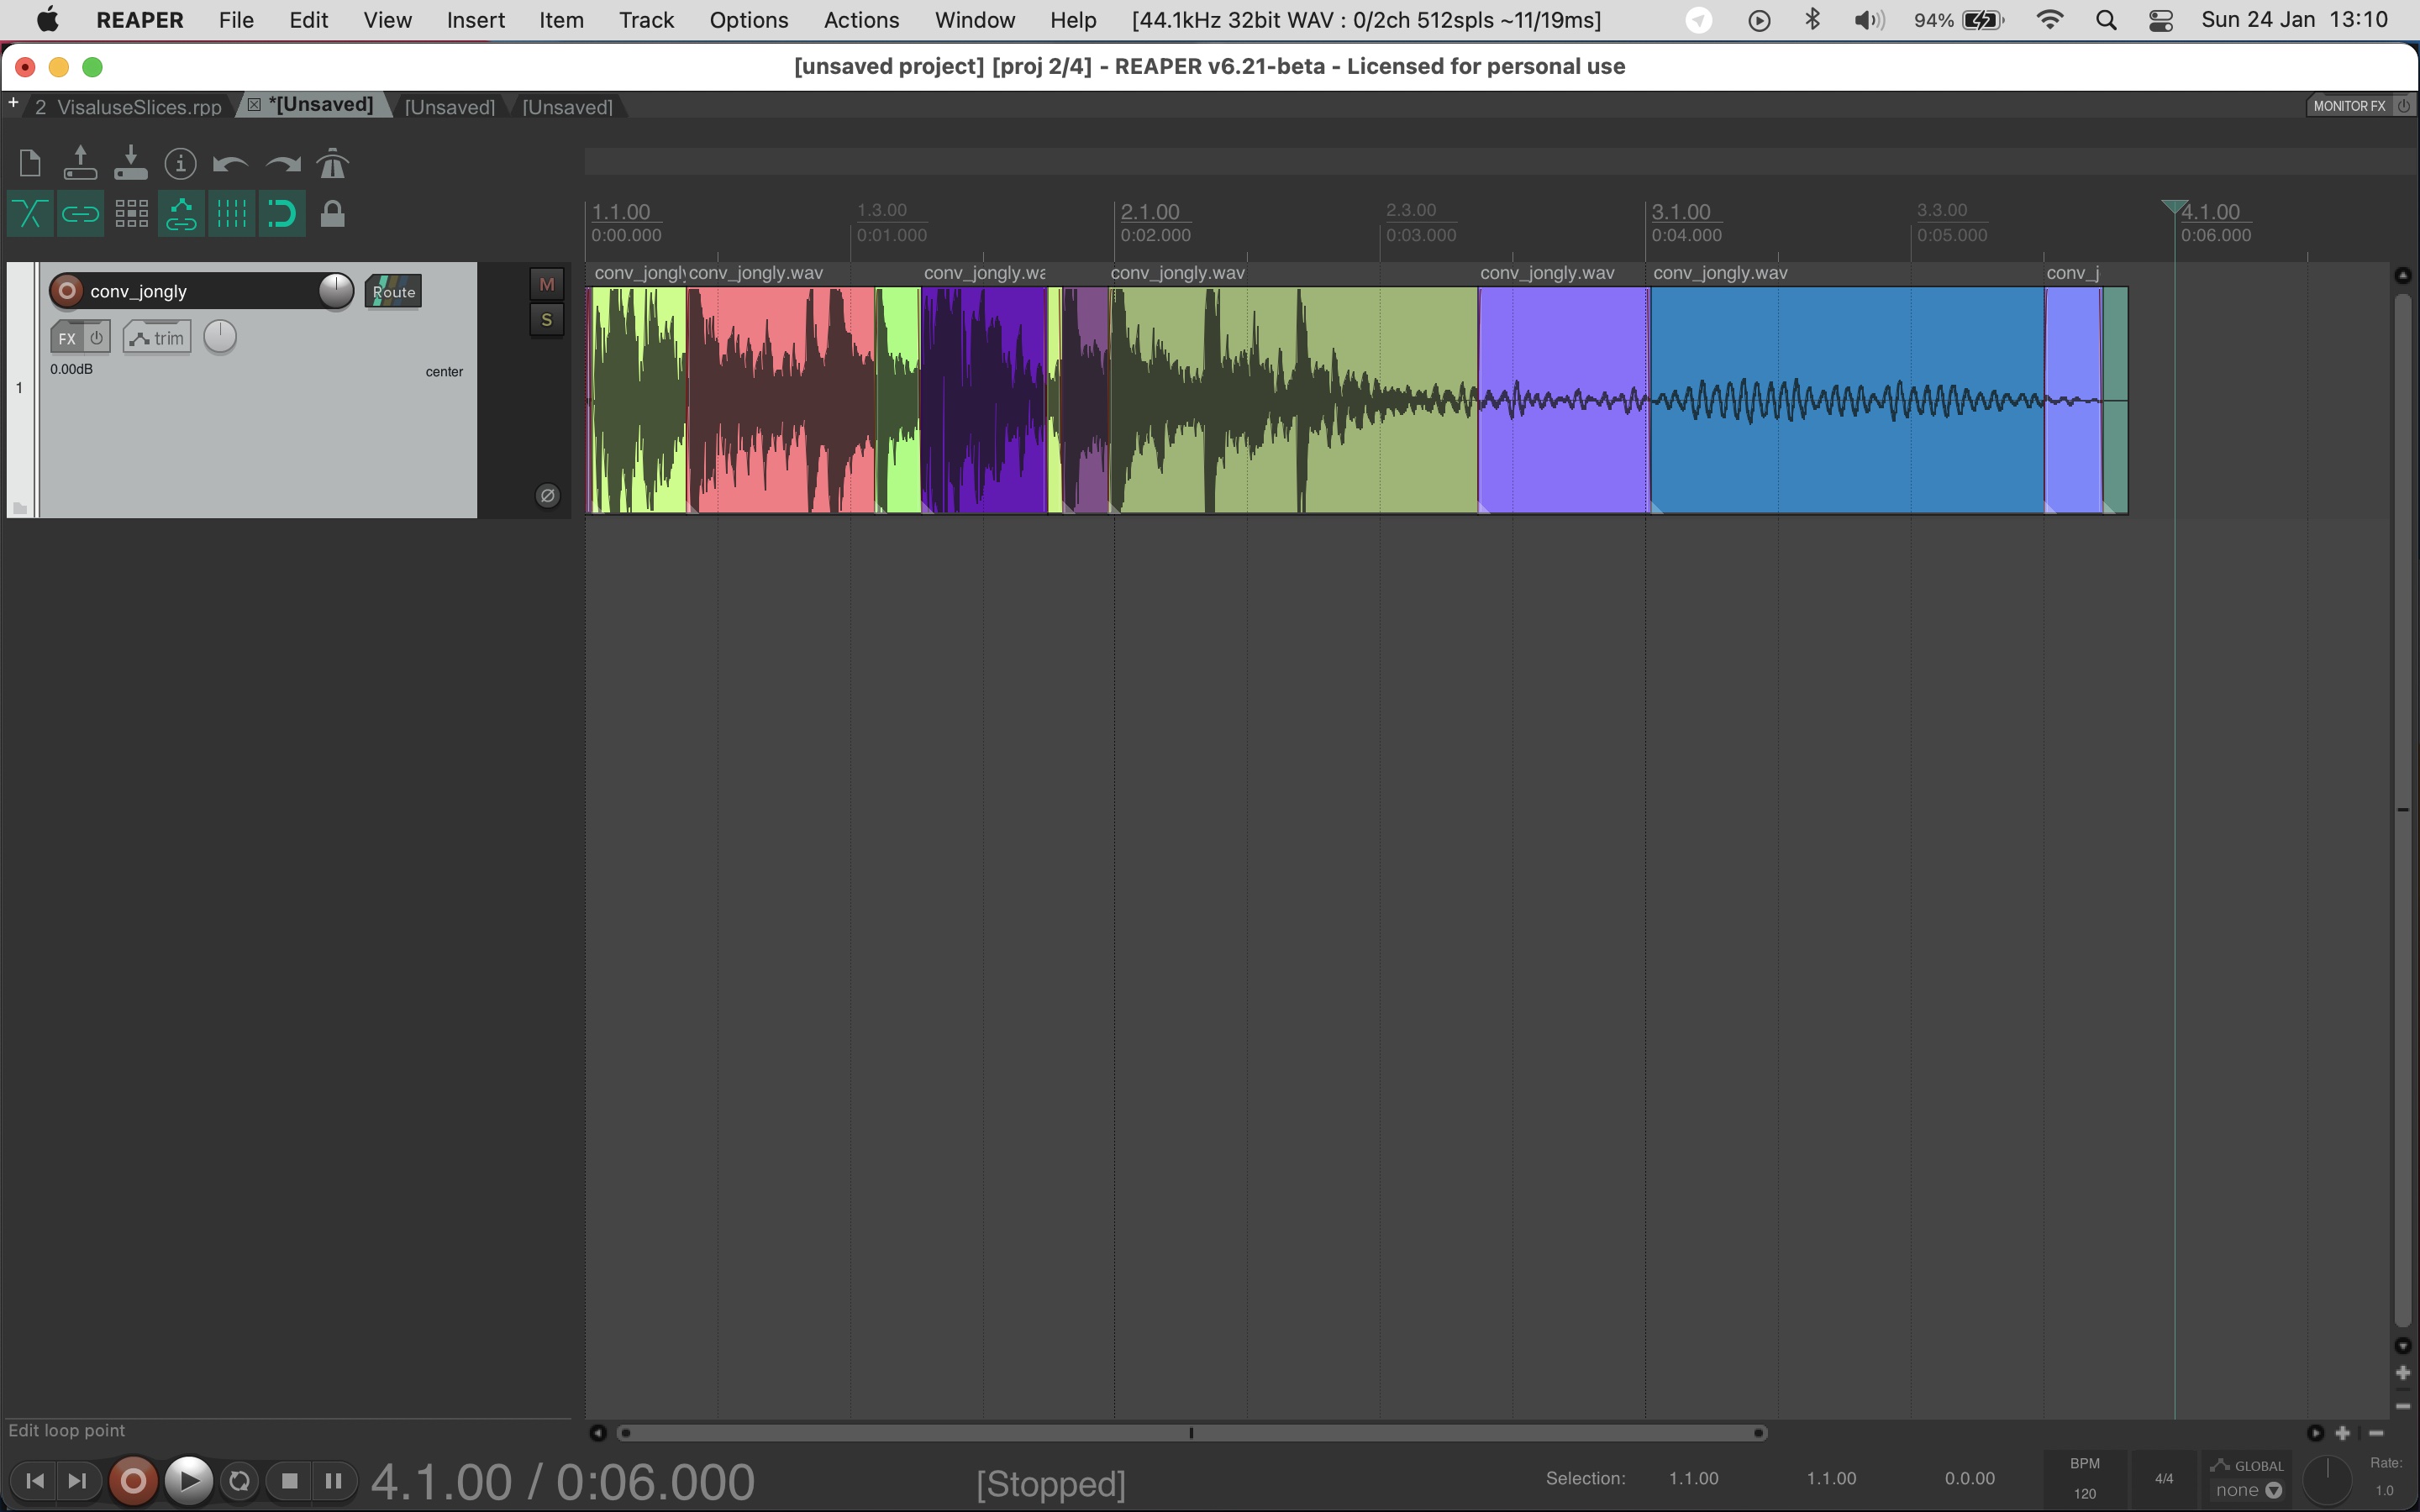
IMAGE 5.3.3: fluid-noveltyslice.lua is used with default parameters, rendering new takes at each slice point.
Experimental Scripts
The initial aim of ReaCoMa was to process media items on the REAPER timeline. Achieving this required significant research to understand the ReaScript API. New possibilities became apparent in this research, such as how I could attach additional metadata to items through notes, organise media items according to audio descriptor data and enhance the segmentation workflow through automatic parameter selection. From this, three categories of experimental scripts emerged.
Sorters
These scripts sort media items in the REAPER session timeline by ordering them according to audio descriptor analysis. There are two variants, one that sorts by spectral centroid and one that sorts by loudness. To produce a descriptor for each media item , the script orchestrations a frame-by-frame analysis and then averages the per-frame values. Each segment is then sorted along the timeline according to this summary.
Auto-Slicing
Performing segmentation with the FluCoMa toolkit often requires specifying a number of parameters to achieve the intended results. Sometimes it can be difficult, or unintuitive to find a combination of parameters that will produce the desired number of segments. The goal of the “auto-slicing” scripts is to automatically find the optimal settings for the fluid-noveltyslice algorithm so that it produces a predetermined number of slices. It solves this problem through brute force, incrementally adjusting the threshold and measuring how many slices were produced. Based on the results of this process it will increase or decrease the parameter to achieve the desired result. There is also a variant of this script which will keep the threshold the same while altering the kernelsize parameter. With the same amount of desired slices these two variants produce different results.
Tagging
I wanted to be able to annotate media items with descriptor analysis data. The tagging scripts, tag-centroid.lua, tag-loudness.lua and tag-pitch.lua, use the relevant descriptor algorithm from the Fluid Decomposition Toolbox (fluid.spectralshape, fluid.loudness, fluid pitch) to calculate statistics (average, minimum, maximum, median) of the relevant audio descriptor across all the frames or values of a media item. This analysis is appended as a note to the media item and can be quickly viewed by hovering over the note icon. Instead of having to alternate between REAPER and another environment, I could make quick assumptions about the perceived loudness, brightness or pitch of samples to inform decisions involved in selecting sounds or their organisation. This also supported rectifying differences in my intuitive perception of sounds and how they might be processed by analysis in FTIS for example. IMAGE 5.3.4 demonstrates the output of the tagging script and how it can be viewed on a media item.

IMAGE 5.3.4: Each item has been tagging using tag-loudness.lua. The results can be quickly viewed by hovering over the note.
The Role of ReaCoMa in My Practice and Case Studies
ReaCoMa supports the phase of my compositional workflow during which I intuitively operate on materials within the frame of decomposition and deconstruction. While FTIS supports querying that is operating on corpora, ReaCoMa is important when I enter the more tactile phase of my practice in which I compose intuitively and manipulate materials through trial and error as well as experimentation. ReaCoMa has proven to facilitate different forms of querying to FTIS too, especially when I work with individual sounds. The following case studies demonstrate these.
Transient Extraction
In sys.ji_ from Reconstruction Error, a combination of fluid.noveltyslice.lua and fluid.transients.lua scripts are used to take a long sample and reshape it into a passage of music. I first deconstructed the sample into short segments which are randomly reshuffled to obfuscate the original morphology. Progressively by the end of this process, these random shuffles are “undone” so that the morphology of the original sample is reconstructed. I then decomposed those segments into a transient and residual component (everything except the transients). A fade in envelope is applied to the residual component and both components are summed together. This modifies the morphological and textural properties of the sound as the residual component is gradually introduced while the transients are exposed. This functioned to also generate various colours of impulse-based material, and as a way of temporarily suppressing the noisier aspects of the sound. The affordances of being able to treat the sound as two distinct components catalysed the formal shape, thus positioning ReaCoMa in another form of computer-led compositional decision making. DEMO 5.3.1 allows you to explore this decomposition process by listening to each of the extractions in isolation.
In X86Desc.a, a section spanning 1:20 to 1:37 is built from several interlocking streams of impulse-based materials or clicks. These were not created manually; rather, they were discovered by extracting the transients from spectrally complex noise-based source material. With this approach, I was able to find intricate and varied patterns of this type of material by exploring with the extraction algorithm decomposition processes. This is demonstrated in DEMO 5.3.2.
Harmonic-Percussive Source Separation
In _.dotmaxwave, fluid.hpss.lua is used to separate the harmonic component and percussive component from source material possessing a dominant pitch component and a subtle shade of noise. With this approach, I achieved a high degree of control over the sound that would be otherwise difficult. It also guided me towards structuring the piece around manipulating the relationship between the two extracted components. In this way, the decomposition process situated within a tight feedback loop of listening and processing, facilitated sound discovery and conceptual development. DEMO 5.3.3 allows you to isolate the harmonic and percussive components to observe the decomposition results in this piece.
Non-Negative Matrix Factorisation
When working with thick and texturally dense sounds, non-negative matrix factorisation (NMF) processing became useful as a means to unpack those sounds into distinct components. An example can be found in P 08_19 from Interferences at 1:35 and 3:39, in which a sample is split into two channels through NMF decomposition. This disentangles prominent perceptual qualities which are superimposed in the source. The overall morphology and structure of the sound remains intact, but can be manipulated and reconfigured to aid in melding this sound with other materials, especially across the stereo image. DEMO 5.3.4 allows you to audition the source material from Interferences that I processed with this technique, before and after the result.
Chaining Processes
As I became more fluent with ReaCoMa in my workflow I began to use it in more sophisticated ways, such as by chaining together processes to deconstruct sounds. In P 08_19 from Interferences, one particular texture I created serves as a pertinent demonstration for how chaining allowed me to retrieve specific and nested segments from a composite sound and to compose with it directly in REAPER.
The resulting texture can be heard at 8:01 in P 08_19 as a subtle noise-based sound layered with a prominent pitch tone. This noise layer (which can be heard in isolation in AUDIO 5.3.1) was derived through a multi-step extraction and decomposition process, which began with my separation of a source sound into transient and residual components. Because ReaCoMa produces new takes in this scenario, I could easily toggle between which component I wanted to operate on afterwards. I then used the novelty slicing algorithm on the transient component, which produced segmentations that were perceptually aligned with moments of rapid changes in the signal. Using a ReaCoMa sorting script, I arranged the segments on the timeline by their spectral centroid. This allowed me to then manually audition and select a group of samples with delicate and fragile qualities by listening to sounds only arranged at the right edge of the group of samples. Because these segments are sorted, these were sounds with a high average spectral centroid. Thus, I was able to isolate gentle high frequency material from the longer source material. I then constructed the final texture by intuitively arranging those samples that I extracted from the main section into blocks. Further signal processing was applied using harmonic-percussive source separation to remove a lingering pitched component, in combination with waveshaping and dynamic expansion. VIDEO 5.3.1 shows how this process worked in practice, although it is a recreation of the steps after the fact so the replication of the noise-based layer is not exactly the same.
This process was not designed as a step-by-step plan to begin with and at each stage I would attempt different combinations of processes to try and extract the delicate and fragile sounds from within the block of source material. Being able to audition, test, undo and rapidly weave between different strategies allowed me to find a specific moment of sound across a whole sound file relatively easily.
Further Information
I produced a series of video tutorials (see VIDEO 5.3.2) that demonstrate how to install and use ReaCoMa. This video series is useful as a resource that documents how the user facing parts of ReaCoMa work and shows some use cases related to my own practice. The ReaCoMa Source Code is available as well as an external site with additional documentation at https://www.reacoma.xyz.
VIDEO 5.3.2: ReaCoMa Tutorial Video Series.